|
by Fiona Valentine  Interested in learning how to watercolour? Have you wondered if it’s the right medium for you? Maybe you just want some simple watercolour how to tips? This blog post has my top tips on some super easy basics to keep it simple. Watercolour is a popular favourite, known for its transparency and luminous washes. When you take some time to get to know her secrets, watercolour will do so many things for you with a minimum of effort. Rain, skin, water, petals, reflections, smoke. It’s a very exciting medium. You plan, get your materials ready and then BANG all the action happens in quick bursts while your paper is wet and you have a “window” to work in. Let’s talk about equipment basics. How To Watercolour Tip: Paper"Choose great paper. The paper you use is your #1 tool for great results. Nothing else will make more of an instant difference to your watercolour than the right paper. Arches is my choice and I prefer the 300gsm rough. It’s a beautiful, thick paper and bought as a “block” it has a gummed edge that helps hold it flat while you work. There are other types of paper and ways to stretch, but this is a super easy "get started" blog post, right? So, we are going to keep things really simple.  © Fiona Valentine Watercolour Autumn Leaves How To Watercolour Tip: PaintArtist’s quality watercolours (not student paints) are the second most important choice. You cannot get great results without great paint. Give yourself the best chance of success. I like to use Windsor & Newton or Schminke paints. Daniel Smith are also fabulous. If you want to learn more about which colours to choose and why, check out my blog post on colour. If you really want to conquer colour, I've created The Colour Course. It's a fast and fun way to dive deep into understanding colour mixing. How To Watercolour Tip: PaletteA white dinner plate works great as a first palette. Squeeze out some of each colour around the rim. You can keep your paint and use it even once it has dried (unlike other mediums). A little goes a long way! Just cover the plate to keep out dust and it’s all ready for next time. A simple palette with wells for mixing colour is my recommended choice. Mixing fresh colour is great when you want a really strong mix for a larger area, but most of the time, I work from dried paint to create my mixes. How to Watercolour Tip: Brushes,As for brushes, you are looking for a great tip. Synthetic brushes are so good these days, you don’t need to invest in expensive sable brushes. Ideally, get 2 or 3 of each size so that you can have a different brush for each colour, ready to move quickly while your paper is wet. A large flat or round for wetting your paper and big washes, a couple of size 8 rounds and then a rigger and some tiny brushes would be a great starter set. Look after them by not leaving them standing in jars of water. Rinse wipe with paper towel and reform the tip, then leave to dry lying down. With care, your brushes will enjoy a long life. Clean up is a breeze with watercolour. If you have only a small space for painting, short time windows or struggle with allergies, you may find that watercolour is a very convenient medium to choose! Now that you know the basic gear you need, add some paper towel, two water containers and some masking tape to hold down your paper and you'll be all set. So, let's talk technique. 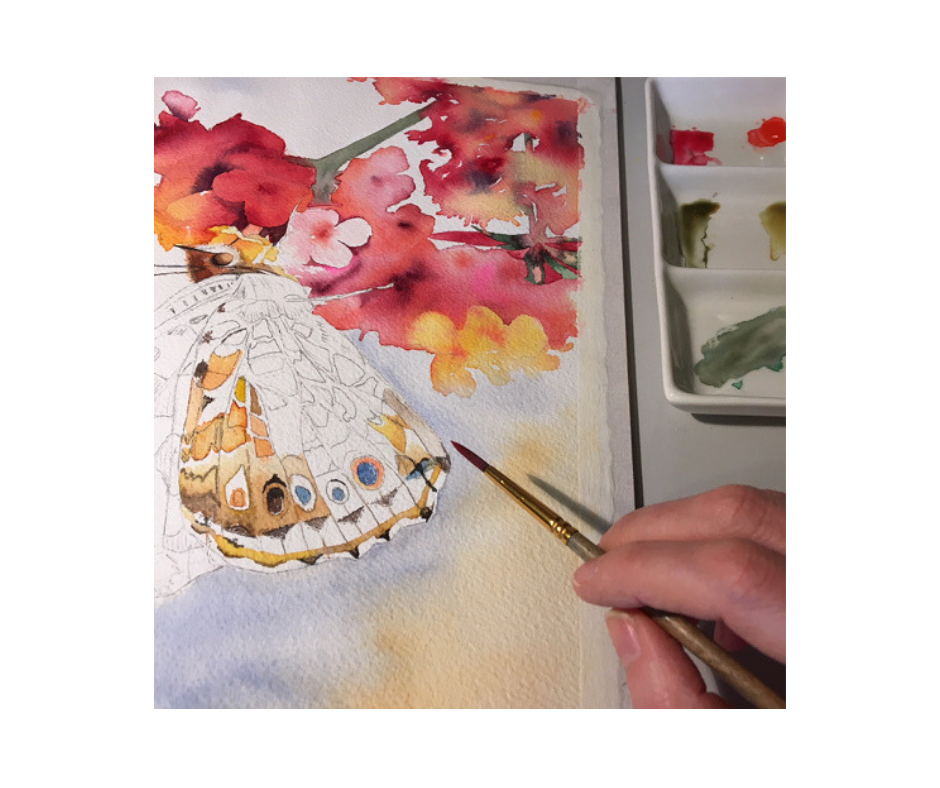 Watercolour is a very convenient medium to choose - clean up is a breeze! How To Watercolour Tip: Flat Wash
Check out this quick video to see a flat wash in action. You can create smaller shapes on dry paper in much the same way. You could actually complete an entire painting using just this technique alone! Allowing each shape to dry completely, you can create another layer on top. Letting each layer dry can be sped up using a hair dryer. Drying in between layers without fussing the paint while it's drying is one of the MOST important things you can learn to do. Understanding this helped me take a giant leap from messes to paintings when I was starting out. How To Watercolour Tip: Wet in Wet
Watch what happens here with Pthalo Blue! How To Watercolour Tip: Damp PaperThis time, wet your paper with clean water and wait until the sheen goes DULL. The paper should be just damp.
This is a great way to create soft, out of focus edges. In this quick video, I'm using several colours to create a background. These 3 techniques make up the core of how to watercolour. Working with different sized brushes, different colours and varying the timing and amounts of paint and water a huge variety of effects is possible.
There is so much more to say, but if you can think in terms of these 3 simple washes and practice with quality materials, you will be well on your way with watercolour. Combine your new skills with good references and an accurate drawing and have some fun. I hope seeing watercolour simplified like this helps you as you decide which medium to focus on. For more on WHY I recommend focusing on just one medium, check out this blog post. Be sure and grab my free pdf "Your Creativity Matters"
2 Comments
20/8/2021 05:01:22 am
My cousin has been thinking about learning how to water color because she thinks that it will be really fun. She would really like to take some lessons from a professional in order to be better. It was interesting to learn about how edges can be softened when they use a damp brush to see if the paper becomes dull. 27/5/2022 04:48:23 pm
Very much appreciated. Thank you for this excellent article. Keep posting! Leave a Reply. |
Hi, I'm Fiona. I'm an artist and art coach. I help aspiring artists learn to paint for fun AND for profit even if they've never sold any of their work before.
You have more than enough creativity and talent, what you need are skills - both for making art and the art of selling art. I can help! Archives
January 2022
Categories
All
|
 RSS Feed