|
by FionaValentine | Drawing Interested in drawing? It is absolutely possible to learn to draw beautifully! Like learning to drive a car or learning to read – if you have the desire, someone to teach you and you practice what you learn, you’ll get it. In this post, I’m going to show you step by step how to learn to draw, even if you are a complete beginner. Even if you can’t draw stick figures! There is no ONE way to draw. Or paint. There are many ways, many styles. I like to draw realistically, using techniques developed in the 19th century to overcome problems that every artist has to overcome. I’ve adapted these techniques for people who have little time and want to move ahead more quickly. So, let's talk drawing. Learn to draw: 3 simple steps.Here are my 3 simple steps for drawing:
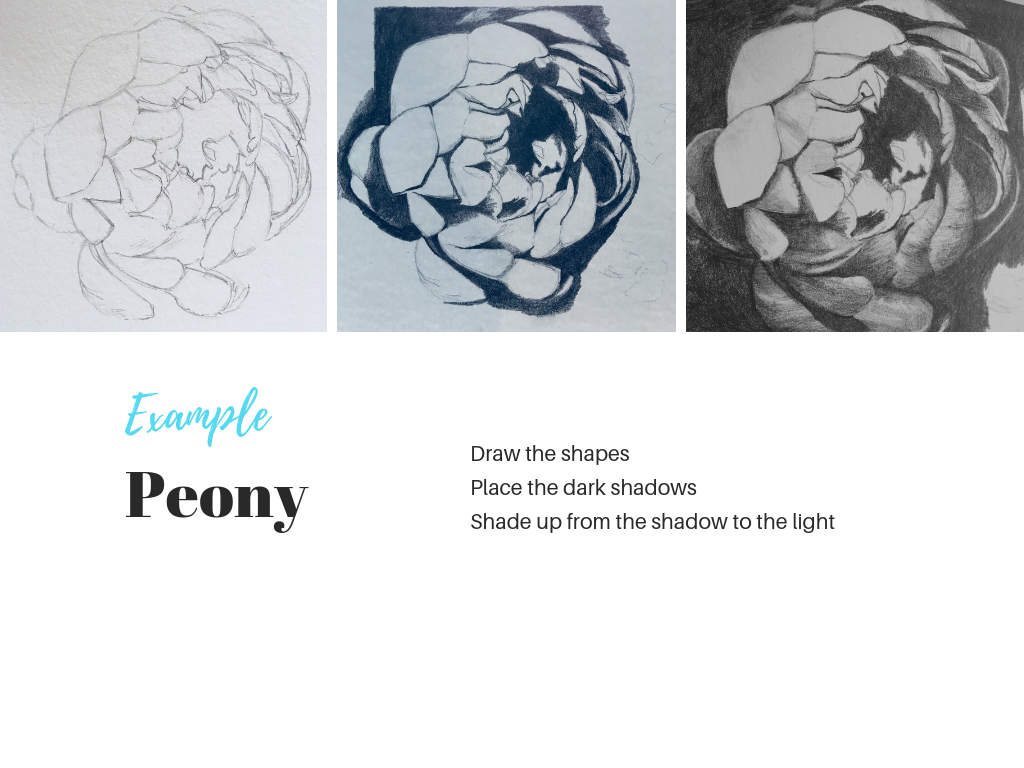
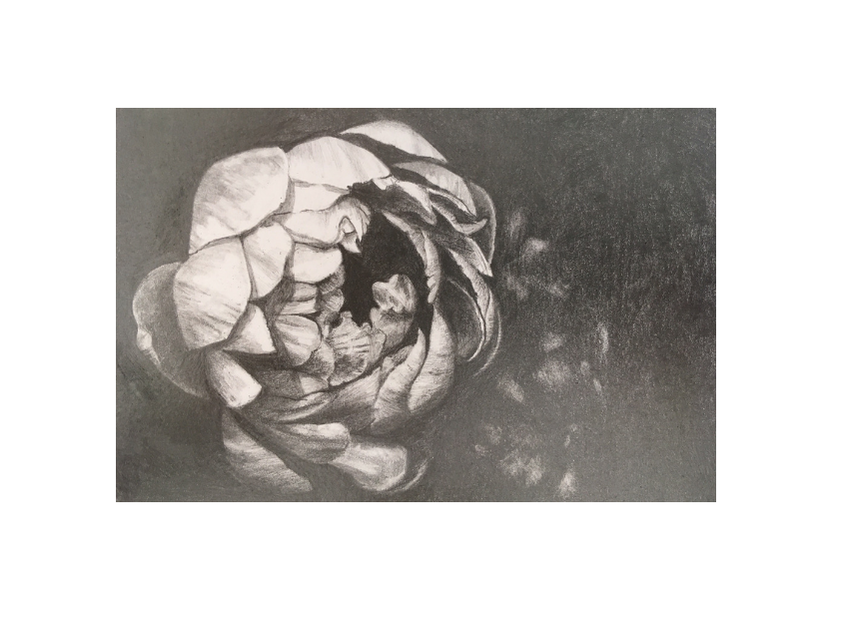
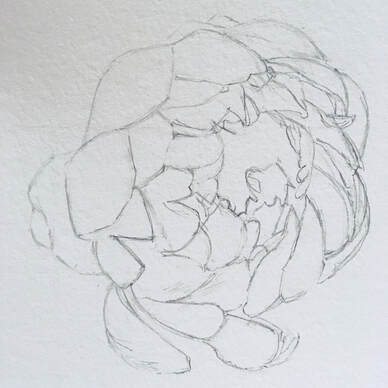
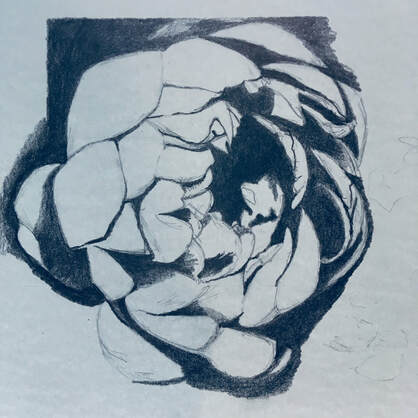
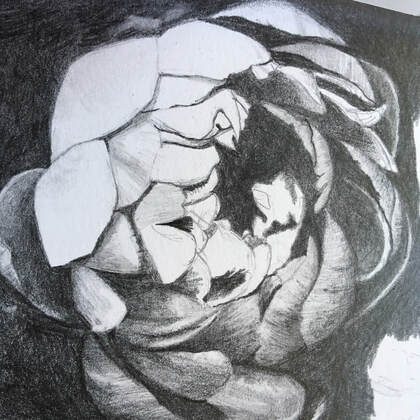
It might surprise you to know that the first is the most challenging, the least rewarding and the main one you need to practice. Let’s take a closer look at how it works. Here is an example of a frilly peony, one of my absolute, favorite flowers. First, I drew the shapes. Second, I placed all the deep dark shadows as simple, flat layers. Third, with a softer pencil, I began shading from the dark shadow up to the light. Here the image goes from clunky and awkward to looking touchably real. Here’s the finished result. By far, the hardest part is step one.
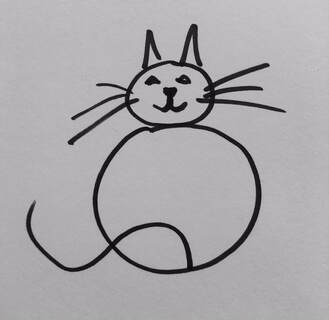
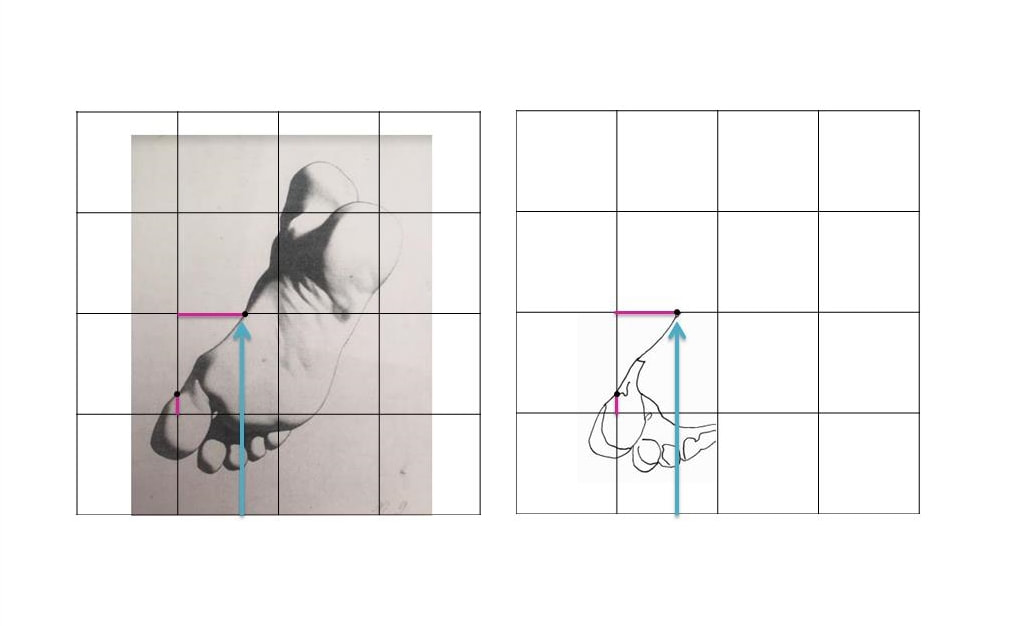
This is true for both experienced artists and those just beginning to learn to draw. But, take courage, friend. The next two steps are not so hard and take your line drawing from ordinary to extraordinary. Learn to Draw by Learning to SeeThe biggest problem we have in learning to draw is learning how to see. It’s not drawing lines and dots and connecting them to make shapes. It’s not filling in shadows and shading gentle transitions from dark light to dark. It’s seeing. Our brains love short cuts. When you read, you no longer see each individual letter and identify it, sound it out and blend it with it’s neighbor. Your brain is so practiced at reading, it swallows whole sentences at a glance and figures out what they are saying. It does this by teaching itself to recognize symbols. Perfect for reading, driving and everyday tasks. Not perfect for drawing. When learning to draw, you need to actively work against this habit. For example. My grandmother taught me to draw a cat like this. This is a symbol of a cat. Most children draw symbolically quite naturally until they are about 9. At this point, we often desire to learn to draw more realistically. If we get some instruction at this point, we learn that to draw a realistic cat requires observation. I need to draw what I see, not what I think I see. To see, I need a real cat or a photo or picture of a cat to look at. I can learn how to draw this real image realistically, step by step. With practice, I can develop drawing skill and confidence. If I don’t get any instruction on HOW to draw realistically, I may conclude that I am just not good at drawing. Learn to Draw by using toolsMany people have the mistaken notion that to be a “real” artist, you must be able to draw or paint whatever you want from your imagination straight to the canvas. This is an impressive skill, but it is not the way artists usually work. Especially artists interested in realism, To draw and paint “stuff that looks like stuff’ most artists use references. Artist references include live models, the outdoors or objects carefully arranged and lit. All sorts of tools have been used throughout history to move from a live model or scene to the canvas. These days we have cameras, photos, projectors. Using tools is not cheating. It doesn’t diminish the importance of drawing, it is part of the process. We don’t consider builders, doctors, architects who use tools “cheats”. We respect the skill and knowledge with which they use their tools. Learn to Draw Step 1: Shape So, our first step is to draw the shapes accurately. The grid is my secret weapon for those who want to learn to draw accurately and quickly. Let’s look at how we use it. First, place dots accurately where an edge intersects with the lines of the grid. You can use a skewer to measure. I hold the skewer in my non drawing hand, leaving my drawing hand free to place a mark. Measure on your reference image, then transfer to your drawing image. Once I have dots in place, I ask myself if the line between the dots I curved or straight. I can imagine drawing the line, practise drawing it in the air, then gently and confidently draw it on my paper. Soft lines made with light pressure mean it is easy to erase a line if I need to change it. Next, look at the line between each dot. Is it straight, is it curved, where does the line go? Now slowly square by square, try to copy what you see. Rub it out if it’s not ok and do it again. Be kind… this may be your first time using a grid and it takes some getting used to. I have a free worksheet you can download at the end of this post to give you some practice with using a grid on some simple shapes. Here is my Step 1 drawing of the peony. The finished Shape looks pretty ordinary. Learn to Draw Step 2: ShadowStep 2. Now we will fill in the shadow areas with a 6B pencil. Slowly, making tiny x or circular marks, aiming for a perfectly flat finish, working gently so as not to crush the paper. This stage can be time consuming. Think of it as a meditation not a race. Learn to Draw Step 3: ShadingStep 3. Shading. This is the exciting part. Softly work over the transition from shadow to the light making small circles with your pencil. This line between shadow and light is called the terminator. We work gently up towards the lightest area, continuing to make small circles. OK. Have a look at your work. Remember you’re here to enjoy your creativity and move towards confidence. You’re not here to impress anybody with your perfect skills. So, relax. Have fun. Mistakes are the way we learn to draw, so avoiding them is really avoiding learning. I give you official permission to make 100 ugly drawings as soon as possible! Make very good use of this. It is your key to success.
You can learn to draw and improve your skills ONLY by practicing. So, go book some practice time in your diary! Even 10 minutes is enough to get you started. You can get my free worksheet pdf to practice drawing with a grid by clicking the button below. The worksheet has 3 simple outlines for you to practice step 1, shape using a grid. Have fun! PS You'll get access to the drawing PDF via my freebie vault which has 7 other resources to encourage your creativity!
3 Comments
Terry
11/1/2020 03:27:22 pm
Very helpful
Reply
15/6/2022 07:32:19 pm
You wrote this blog very well. Very knowledgeable. Thanks for sharing this
Reply
Leave a Reply. |
Hi, I'm Fiona. I'm an artist and art coach. I help aspiring artists learn to paint for fun AND for profit even if they've never sold any of their work before.
You have more than enough creativity and talent, what you need are skills - both for making art and the art of selling art. I can help! Archives
January 2022
Categories
All
|

 RSS Feed