|
by Fiona Valentine  If you’ve been wondering how to use graphite transfer paper – this blog post is for you. If you are thinking “Transfer paper? What’s that?” it’s paper that has a layer of graphite on one side. It works like carbon paper to make a copy. If “why should I care?” is your next question – here are four great reasons you are going to love transfer paper.
Don’t get me wrong, I am a firm believer in learning to draw. Drawing is all about seeing accurately and if you can’t “see” you can’t paint well. But if we all had to wait to learn to draw well before we got in to the fun of painting, we might never start. I encourage my art students that learning to paint is like a triathlon – you need to be able to cycle, swim and run, but if you try to learn all of these at once, it’s going to be a little overwhelming. Learning to paint AND draw AND mix colour is a lot. It's OK to tackle one skill at a time. But transfer paper isn't just for beginners, oh, no. Every artist knows that some drawings just work best when you aren’t trying too hard. So, what if you captured something amazing, but it’s on the wrong paper or in a little sketch book or you just want it bigger?
 Graphite transfer paper may just be your new best friend If you’ve ever used tracing paper, you know you draw over the image underneath, then draw on the back, then flip it over to once more draw over your lines, transferring to a fresh piece of paper. That’s 3 times!!! Using graphite transfer paper is an easier way. So, if you are keen to speed up your practice, get started the easy way or just want to quickly transfer a drawing or photo to canvas or paper, let’s talk about how graphite transfer paper might just be your new best friend. How to use transfer paper: Step 1Grab the paper you want your drawing transferred to. Tape the paper securely to a board or table so it's not going to move during the transfer. Be generous with the tape and really rub it down hard so it grabs tight. Trust me, you do NOT want this moving half way through your transfer. If you are transferring to canvas, you can skip this step. 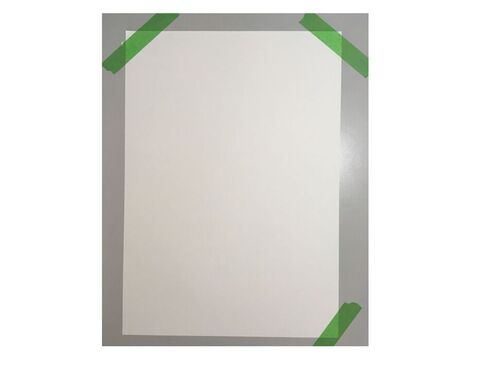 Step 1 - Tape your paper to a board or table How to use transfer paper: Step 2Step 2 is to securely tape a photocopy of your drawing or photo on to the paper at the top. Place it thoughtfully.
Again, make sure you rub the tape (with clean hands) so the image isn't going to move. If you are transferring to a canvas, tape your photocopy to the canvas. You may need extra tape to make it stick securely. 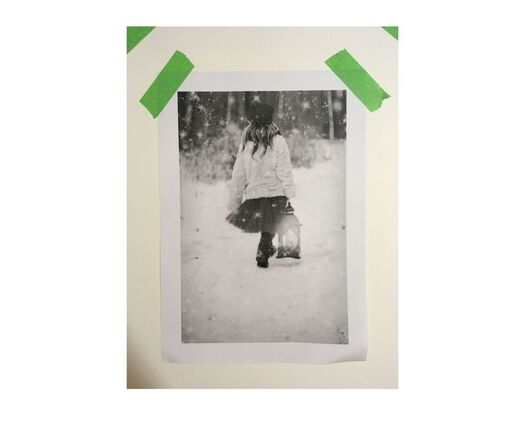 Step 2 - tape your reference image to the paper How to use transfer paper: Step 3Slip the graphite paper between the photocopy and paper or canvas. Place it dark side down, so the graphite transfers to the paper NOT the back of your photocopy! #been there #never doing that again 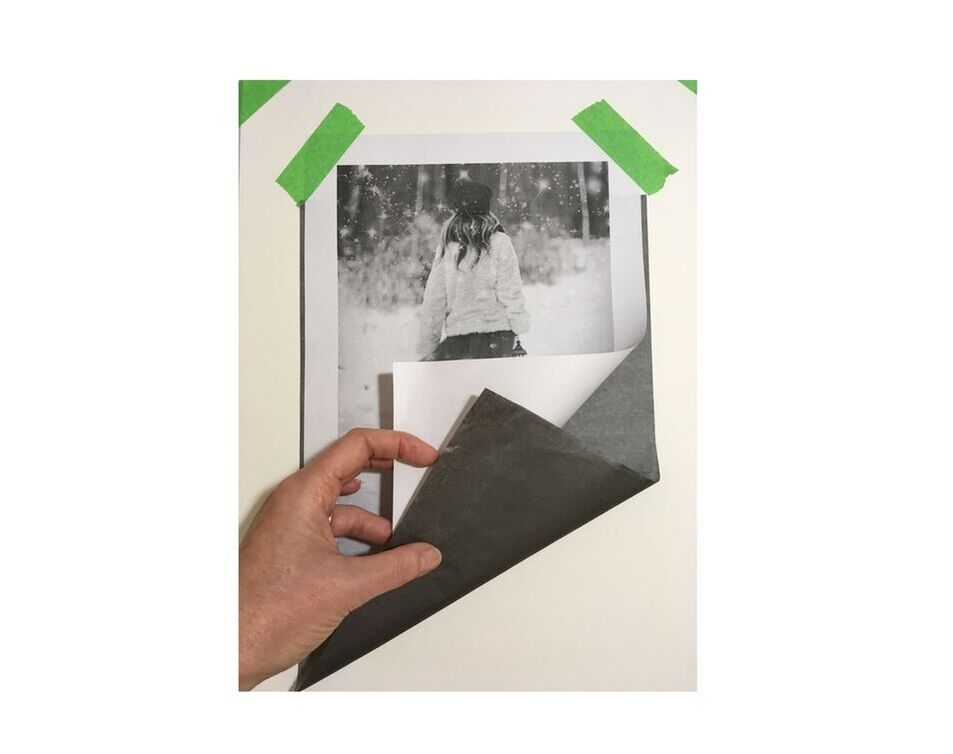 Step 3 - Place transfer paper graphite side down How to use transfer paper: Step 4Now draw over your photocopy. I like to use a red pen as it shows where you have already drawn. A pen will give a firmer line than using a pencil. You can transfer as much or as little information as you need. If your transfer paper is new, you may need light pressure to keep the line from being too thick and dark. Experiment to see what works best for you. 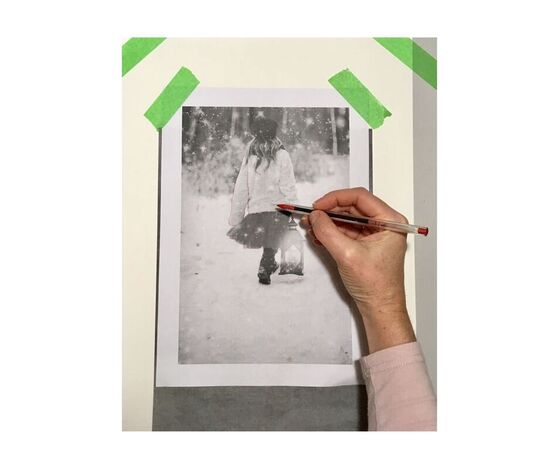 Step 4 - Draw over image with a red pen How to use transfer paper: Step 5When you think you’ve finished, lift up the photocopy carefully and double check your drawing before moving the photocopy image. Once moved, it’s tricky to get it back in place exactly. (It can help to draw double lines from the photocopy onto the paper in a couple of spots to hep you re-position if necessary. Marking the corners before you start can also help.) After adding any missing lines, remove the graphite paper, then the photocopy and any tape. Don't be in a hurry, this step can take 15 minutes or more to really study the photocopy and your transferred image and make sure that all the lines make sense and you have all the information you need to finish the drawing or start painting. Your transferred image is likely to be pretty grubby at this point, especially if your transfer paper was new. Take a kneaded eraser and knead it until it’s soft, then gently drag it over the drawing to pick up any graphite grubbiness. Even on watercolour paper you can do this firmly without damaging the paper as it’s very gentle on the surface. And there you have it, an easy way to transfer a photocopy of
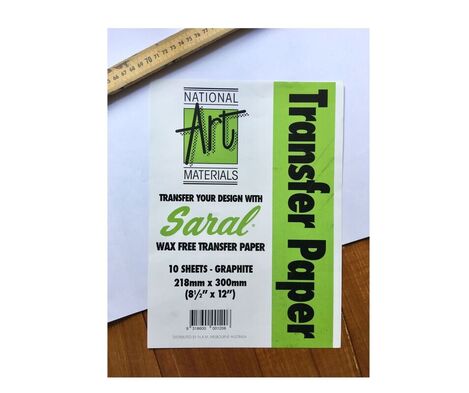
You can even make your own graphite transfer paper by drawing all over paper with a pencil or progresso. It’s slow, but quite effective. If you don’t have a large enough sheet, trying carefully taping a few sheets together. Transfer paper comes in rolls, so you could tape several long pieces together. Some brands do offer large sheets. Alternatively, just keep moving your A4 piece to a new section as you work. Graphite transfer paper is reuseable, so although a 10 pack might cost $25, it will last a long time. It’s a great technique to teach kids, too. I have the kids in my classes work on their drawing and once they have erased, corrected and finalised their drawing, they transfer it to watercolour paper ready for painting. We use washi tape to help hold their watercolour paper down and they love choosing a bright colour and taping it all up. This way they create a drawing AND a painting. 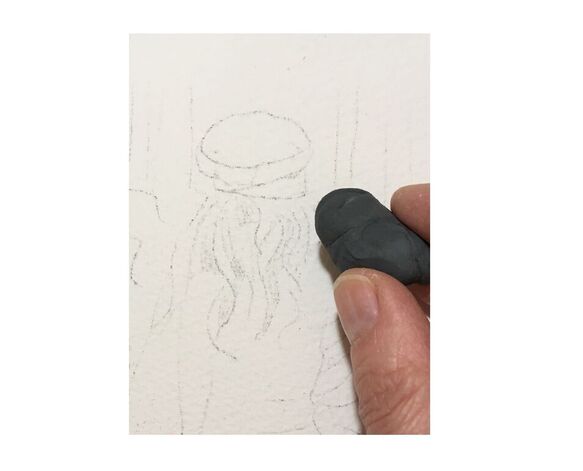 Step 5 - Clean up transfer with a kneaded eraser If you are interested in learning to draw, check out my blog post on drawing here.
You can download a free practice sheet for drawing with a grid here:
10 Comments
20/11/2019 11:26:20 am
Excellent thanks Fiona. A good investment! And larger than carbon paper ~ I like to enlarge my photos of my portrait subjects, so shall invest in a pad of 10 x graphite transfer paper and a kneadable eraser. Previously, Fiona, I've used a medium called " Atelia, Fast Medium Fixer" over my sketch, so it won't show through my first layer of Acrylic paint. I can then apply oils, water mixable or otherwise, after that. I don't know if you can use it under water colour. I've never painted in water colours so far. Beverley
Fiona
21/11/2019 10:29:09 am
I use fast fixer in my acrylic painting to fix layers I don't want to disturb. I've used it over a drawing layer, but i do find it smudges a bit. You can't use it under watercolour. 21/11/2019 08:03:34 am
Yes one feels that drawing/ sketching is a must. Tracing the outline to ensure the right proportions is great as one can spend lots of time trying to get the proportions absolutely correct. eBay has a wonderful Light Box, very thin and it comes in 3 different sizes ....it’s like using a window to trace but better. Not expensive. It works well with all lights off, darkened environment shows up picture.
Fiona
21/11/2019 10:30:19 am
That's a great way to do it, Jinx!
Marcie Rieder
18/2/2021 02:33:52 pm
What do you mean take a eraser and smooth it out? How do I do that? And on the transfer paper? Before I put it on my wood sign or after ? 2/9/2023 02:51:51 pm
Hey, um, I want to take a pencil and my marker draw on my paper so I can take my drawing out of the paper so it can be a real life Leave a Reply. |

Hi, I'm Fiona. I'm an artist and art coach. I help aspiring artists learn to paint for fun AND for profit even if they've never sold any of their work before.
You have more than enough creativity and talent, what you need are skills - both for making art and the art of selling art. I can help! Archives
January 2022
Categories
All
|
 RSS Feed