|
by Fiona Valentine Has learning how to paint in oil ever seemed too complicated? Intimidating, maybe? Me, too. I had oil painting in my “too hard” basket for years. Once I tried it, though, I LOVED IT! Now, I suggest my students START with oil because it is so forgiving and they can get amazing results quickly. Honestly, I might have stuck with watercolour and acrylic forever, but thanks to a birthday present of oil paint from my husband about 7 years ago, I couldn’t resist any longer. I’m so glad I discovered how amazing it is. Let’s break down oil painting into parts so you can find the courage to have a go, too. Oil feels like the ultimate painting medium. It can be used in layers or painted alla prima (all at once). Oil is lustrous with a buttery quality that enables smooth blending. If you don’t like something, you can just scrape it off or paint over it! Oil paintings can be built up in lots of ways.
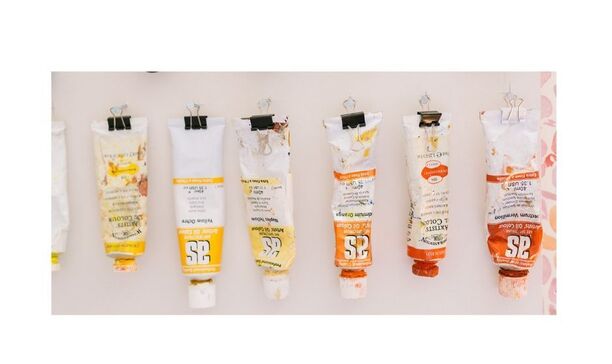
Armed with some basic info oil is wonderfully forgiving and can be managed with a minimum of fuss and mess. So, how do you use oil? Let’s start at the beginning with materials you'll need. How to Oil Paint #1: PaintUse artist paint as the pigment will be good quality and you will be able to mix better colour. Student grade paints often have cheap pigment and lead to muddy mixes which will be frustrating for you. Good pigment means you can mix bright, clean colour. Winton by Winsor and Newton is a great starting place as their student paint uses the same pigment as their artist quality range. You will use more paint as the pigment ratio is lower, but at least your mixes will be clean and you don’t have to spend a small fortune to begin. How to Oil Paint #2: BrushesBoth hog hair and synthetic brushes are suitable for oil. A variety of flat, filbert (these have a rounded oval top) and round brushes in a few sizes from very small to large will get you started. Palette knives can be used, too, for interesting effects. I like to mix colours with my palette knife as it is so easy to clean in between colours..
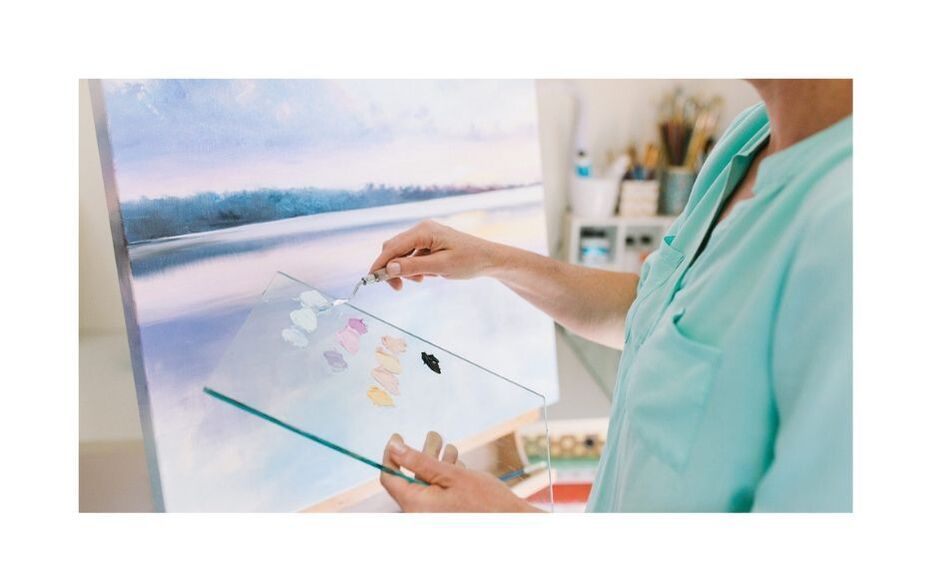
All of these will give you different ways of applying the paint and keep your painting varied and interesting. How to Oil Paint #3: PaletteI love having a glass palette for working at home because it’s so easy to clean. Try using a glass shelf from Ikea. How to Oil Paint #4: SupportA support is just the surface you will be painting on. Panel, canvas or stretched canvas are all suitable. The support should be primed so the paint won’t be absorbed and fade. Many canvases can be bought “triple primed”. Panels or canvas are basically the same as for acrylic. You can prepare your surface with gesso, which is acrylic and can have oil painted over the top. You can also select an oil prepared canvas. Once any gesso is dry with or without texture according to your subject (perhaps smooth for a portrait, textured for a landscape) you can begin in several ways. How to Oil Paint #4: ProcessSketch Sketch your design – if you are working from a photo and don’t feel confident, try using a grid. If you need some help, I've written about drawing here. Once you are happy with your drawing (simple or complex) you can spray with a fixative to keep the pencil from merging with the paint to make an ugly grey. Tone Your Canvas Alternatively, to quickly cover the white of the canvas, try dipping a rag or brush in odourless solvent, add a little bit of paint and rub on some colour to tone your canvas. You can use several colours and block in your drawing very simply. Paint A third method of beginning is to take a small brush and draw in your basic shapes with paint. Thin paint without medium is best for control and so as not to interfere with the following layers. These methods of beginning can be combined, too. Underpainting Once you have your basic shapes, you can paint in brown or grey focusing on just value without needing to consider colour. Although you almost paint the whole thing twice, it helps to just think about one aspect at a time and get it right. The value (light or dark) is important in making the painting interesting and realistic. 3 values of dark, medium and light will do the job. The trick is to get them in the right places. This layer should be thin. Alternatively, tackle a layered approach with a thin layer of colour first, paying attention to lights and darks and the main colour of each area and painting thinly. Colour Layer Once you are happy that the general shapes are correct, paint a little more thickly. Keep squinting to help you determine the values and try to use several colours in each area to keep things interesting. Give careful attention to each stroke, especially the “Master Strokes” in your area of interest. Think about the direction, thickness and shape of each stroke before you touch the canvas. Make each mark count rather than dabbing at the canvas without a plan, hoping things will improve. Alla Prima Direct painting or Alla Prima (meaning "all at once") is a method of painting one layer, with brushstrokes placed mostly as you mean them to look in the finished painting. It's fast, fun and a great way to experiment. It can be done smoothly or with thicker paint. You can still sketch in your shapes first with pencil or paint. I recommend giving both a layered (indirect) way of painting AND alla prima (direct) painting a try. You won't know for a while which way you prefer. Varnishing Varnish is an important final layer to protect a painting from dust, smoke and grease in the air. Varnish can be carefully dusted or even removed and replaced, preserving a painting for generations. Typically, Oils need to dry a long time before varnishing so the paint is not just dry on the surface, but all the way through the thickest parts of the paint. Oil dries by oxidation not evaporation. This can take weeks and even months – some say you shouldn’t varnish for six months or a year. One way around this is to varnish with a spray retouch varnish and then months later when the work is dry, apply the final varnish. Gamvar is a great option and my personal choice. Once a painting is touch dry, you can varnish more quickly than the traditional time as the painting will continue to breathe. Don’t practice your varnish technqiue on your painting – practice on something that doesn’t matter. Use a brush that is only for varnishing and go for several thin coats, drying in between. Don’t go over areas more than once. Gamvar is my varnish of choice. It is much easier to apply than traditional damaar varnish as it is thinner. This link includes a helpful video by Gamvar demonstrating their suggested method of application. There is so much more we could say about oil, including mediums that can be added to thin or thicken oil paint for a variety of effects and various techniques to add interest and texture. It is such an exciting way to paint and gives so many options that you can choose from to create your own unique, lasting, beautiful work that expresses your ideas.
I hope you are inspired to have a go! To encourage your creative journey, you can download my pdf freebie "Your Creativity Matters" here.
4 Comments
24/2/2022 08:28:44 am
The same pigment as their artist quality range. You will use more paint as the pigment ratio is lower, Thank you for sharing your great post!
Reply
23/6/2022 03:25:22 am
A CRM system helps companies stay connected to customers, streamline processes, and improve profitability. Customer management relationship (CMR) is a technology for managing all your company's relationships and interactions with customers and potential customers.
Reply
23/6/2022 05:51:26 am
Customer Relationship Management CRM lets you store customer and prospect contact information, identify sales opportunities, record service issues, and manage marketing campaigns.
Reply
12/7/2022 04:37:18 am
Startups often consider Customer Relationship Management (CRM) to be essential for the success of medium or large size businesses.
Reply
Leave a Reply. |
Hi, I'm Fiona. I'm an artist and art coach. I help aspiring artists learn to paint for fun AND for profit even if they've never sold any of their work before.
You have more than enough creativity and talent, what you need are skills - both for making art and the art of selling art. I can help! Archives
January 2022
Categories
All
|


 RSS Feed